5th grade Art
Printmaking
Students used the vinyl print blocks that they designed and carved themselves to make prints. They experimented with mixing colors and creating doubled prints.
Ceramic Bowls
Students carved a vinyl block (they will use this for printing as well) using line and shape to create a design. They pressed the block into the center of the clay, then added details to the side with additional student made stamps. To create the bowl form, student cut slits into the sides, overlapped the pieces and slipped and scored them upwards.
Edible Color Wheel
Students learned a little about color while having a sweet treat! Students used the primary colors in icing to mix and make the secondary and tertiary colors on the color wheel. Last they made a neutral color (brown, black or gray) by mixing all three colors. Then- snack time!
Starry Night Inspired
We learned about the artist and work of Vincent van Gogh. Students used blending of analogous colors to make the hill. Then they used line and movement to create the glow of the stars.
Positive/Negative Space Symmetry
Students drew a variety of shapes along two sides of each square of paper. Next, they cut out the shapes and flipped them out to glue. This creates a reflectively symmetrical design. The "negative space" creates an identical shape on the opposite side of the line of symmetry.
Yearbook Contest WINNERS CHOSEN! Dominic Chaney was chosen for the front cover and Kayla Morris was chosen for the back cover!
Turn in Deadline: March 2nd (late submissions will not be accepted)
Each year, the WVE yearbook cover is created by our very own 5th grade students. Students will start brainstorming ideas in the art room, but then it is up to them to complete their designs and return them to school by the deadline. Students are encouraged to think of new and creative ideas for these designs.
Here are some requirements for the design:
-Whitewater Valley Elementary OR WVE should be stated somewhere prominently in the design.
- It must also have the years 2017-2018 in the design.
- You should have your name on the design somewhere near the bottom (first and last name).
- You may look off images to help you draw (example: look up what a paw print looks like on Google), but you may NOT copy or trace. This should be YOUR original drawing.
-You cannot create a design on the computer. It must be hand drawn.
-You can use crayon, marker, or color pencil (or and other drawing supplies) to add color to the design.
- Leave about a ¼ inch border around the design. Don’t have anything right up the edge of the paper.
Questions? Contact Mrs. Ferguson at [email protected]
Mardi Gras Masks
Students viewed some masks in different cultures, including Mardi Gras masks, to kick off this project. They drew their mask designs on paper first using 3 steps: creating the contour (outline), dividing the mask into sections, and adding facial features. Each design is an original composition of the students imagination. The learning goals here were: contour line and symmetry and asymmetry. Once the students had two designs they loved, we narrowed it down together to one that would be transferred to metal. Students will transfer to the metal using a process called repousse (or if you don't speak french: tooling or embossing). Students had to trace all the pencil lines to press the design into metal. Then they went over the lines again directly on the metal. Last they added patterns into the sections of the metal. Once completed, they add color with sharpie markers. Finally, the masks are cut out of the metal. It is a long process, but with a great results. Most students are in the final stages of adding patterns and starting color. Fingers crossed that they will be completed by the art show!!
Sculpture: Students created paper tubes that will be the building material for their sculpture. We talked about how a sculpture needs to be both visually and physically balanced. We looked at sculpture work made out of everyday materials as inspiration. Students built their sculptures with glue and paper tubes. There was some frustration, and some set backs, but they overcame it to make some cool projects!
3/4/5 Within Reach
Students were challenged to create a piece of art work with the theme of “Within Reach.” PTA nationally sponsors a contest called Reflections that students can enter art work. The 3rd, 4th and 5th grade students who had the opportunity to work on this at school were given a completely open forum in which they could create their art. They were given the opportunity to paint, use pastels, oil pastels, color pencil, collage, etc… They chose the material based up which media worked best with their plan. If was fun to see the students explore their own creative ideas!
5 Flag
Students used their measuring skills to plan out their drawing. Then they used curved lines to give the appearance of the flag waving in and out. Last, students used different pressures with the color pencil (values) to create the appearance of shadows.
5 Leaf Printing and Texture
5th grade created these beautiful leaf prints using white ink and leaves. We talked about how a print is a copy of one object’s surface texture to another object- in this case, the leaf’s texture to the paper surface using ink. Once the leaves were printed, students used a sponge to print the negative space between the leaves.
Lesson objectives:
positive/negative space; texture
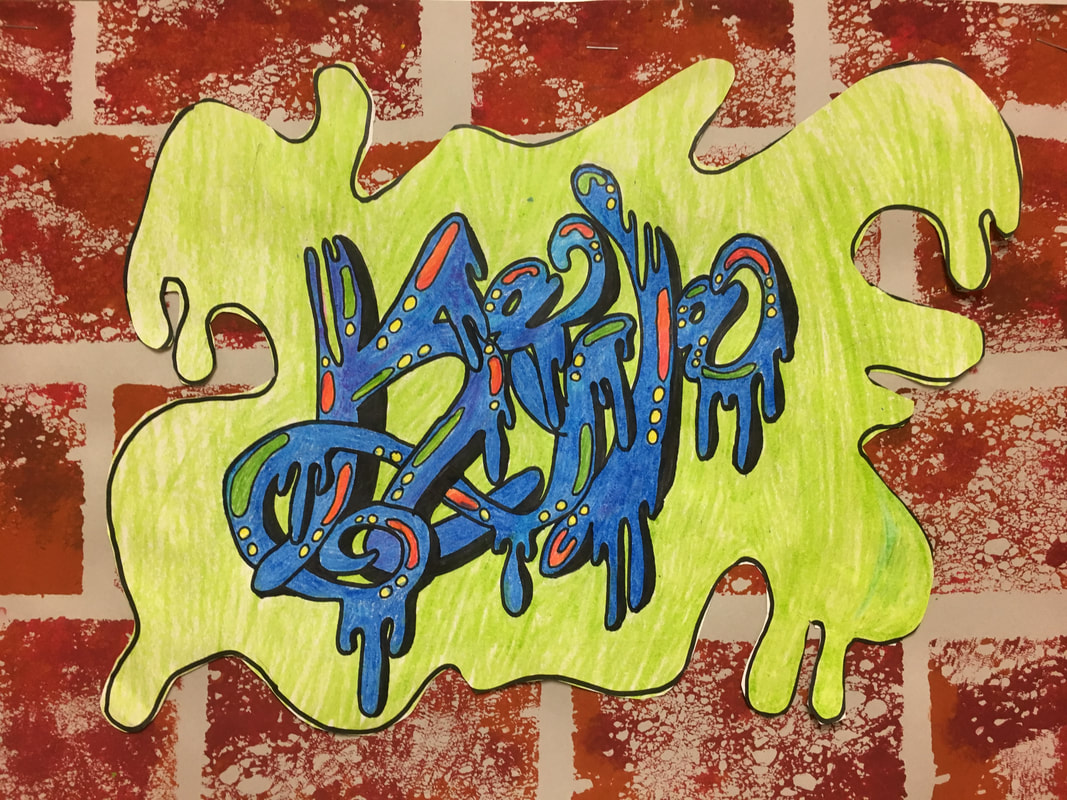
Graffiti Name Project
|

|
Students are startied the year creating their own name in a graffiti style. We started the 2nd week using "graffiti creator" website to see how they could adapt and change the letters of their name. I posted a link below so students can try this from home!
Graffiti website
I posted a link here to a powerpoint of professional artist examples and past student examples that I have put together for the students to see.
graffiti_powerpoint.pdf
Information about Graffiti artists: graffiti_project.docx
STUDENTS!
How to Save your graffiti name (and save it as your background too)
Once you have a graffiti name you like, follow these steps below:
To save an image on your screen-
1. Click the Search button on the bottom of your screen (looks like a magnifying glass)
2. start typing snipping tool in and the snipping tool option will pop up. Click on it.
3. Choose New in the pop up window
4. Move the + cursor to the top corner of the desired image you want to save. Click AND hold your left mouse button while at the same dragging your cursor across the entire image . Let go when the image you want is shown in the box.
5. At the top of the pop up window you will have an option to save (or you can click file and choose Save As).
6. name your image whatever you like and hit save. It will automatically choose to save your image into your pictures folder.
To make your image your backdrop on your computer-
1. go to the search button at the bottom of your screen and type in This PC
2. click on This PC and choose the Pictures folder. You should see the image there.
3. Right click the image and choose 'set as desktop background'.
That's it!
